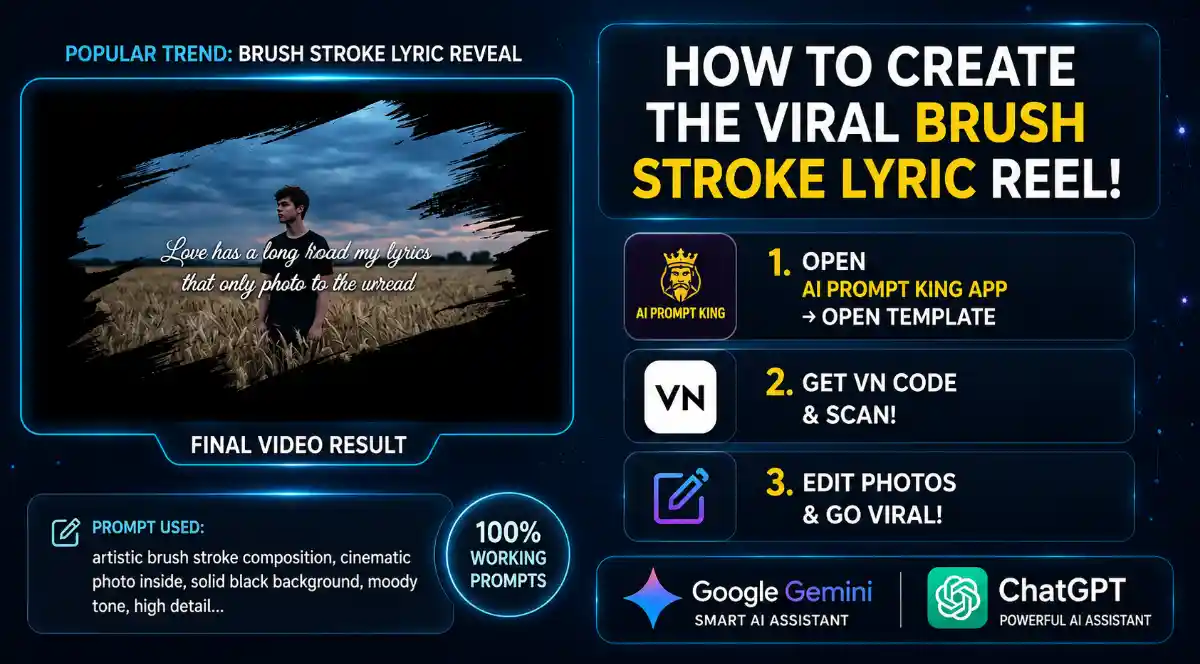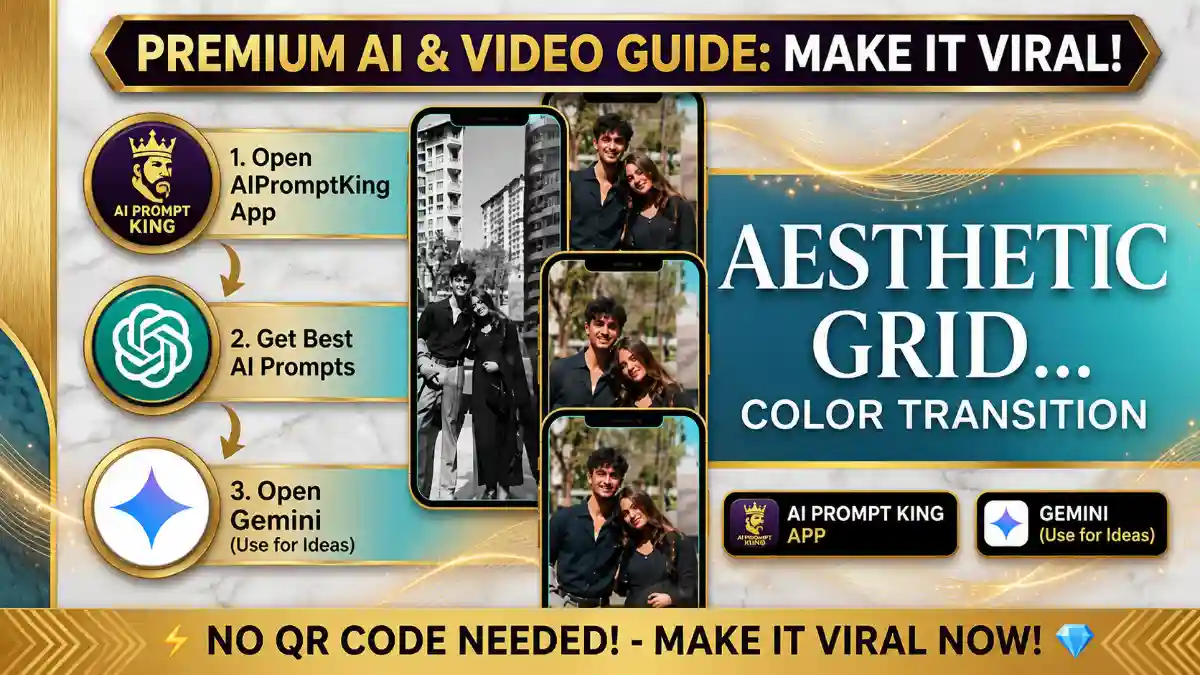
Instagram par aaj kal ek bahut hi unique transition trend chal raha hai jisme 9-Grid B and W to Best Color photos ka 9-Grid B and W to Best Color pehle black and white dikhta hai aur fir suddenly color video mein badal jata hai. Yeh trend khaaskar romantic aur travel reels ke liye perfect hai.
Aap is viral reel ko AIPromptKing app aur ek simple VN QR code ki madad se asani se bana sakte hain. Bas niche diye gaye steps ko follow karein:
Step 1: Open the AIPromptKing App
Sabse pehle aapko is 9-Grid B and W to Best Color transition wala template chahiye hoga jo hamari app par available hai.
- AIPromptKing App Open Karein: Apne phone mein AIPromptKing app launch karein.
- 9-Grid Transition Trend Select Karein: App ke andar “9-Grid B&W to Color” template search karke open karein.
- Website par Jayein: Template ke niche diye gaye button par click karein jo aapko hamari website VelocAI ke dedicated tutorial page par le jayega.
Step 2: Get the VN QR Code
Website par aane ke baad aapko is transition ka special QR code milega.

- QR Code dhundhein: Is article ke niche scroll karein aur official VN QR Code ko dekhein.
- Scan click karein: Is QR code ka screenshot le kar apni gallery mein save kar lein.
Step 3: Scan and Edit in VN Video Editor
Ab bas aapko apni photos aur videos ko template ke saath sync karna hai.
- VN App Open Karein: Apne phone mein VN Video Editor app kholein.
- Scan Click Karein: Home screen par upar right corner mein Scan icon par tap karein aur apna QR code screenshot select karein.
- Use Template: Template load hone ke baad “Use Template” par click karein. Pehle apni 9 photos select karein (jo 9-Grid B and W to Best Color mein dikhengi) aur fir apni main color video select karein.
- Export: Video ko 1080p ya 4K mein export karein aur Instagram par viral song ke saath post kar dein!
How to Use This Guide
This tutorial is part of VelocAI’s growing library of practical AI guides. Every step above has been tested on real devices before publishing, so the workflow you see is the same one that produced the demo result. If a step looks unfamiliar, scroll back to the top and match the screenshots one by one before moving forward — small details (aspect ratio, export quality, audio sync) make a big difference in the final output.
Pro Tips for Better Viral Reels
- Hook in the first second: The opening frame decides if a viewer keeps watching or scrolls away. Lead with motion, a face, or a contrasting colour.
- Match audio to motion: Use VN’s beat markers to align cuts with the music drop. Reels that feel “in time” with the audio get more replays.
- Keep duration tight: 7–15 seconds usually outperforms longer edits for trending audios. Remove any second that does not add value.
- Export at 1080p, 30fps: Higher bitrate exports look noticeably cleaner on Instagram’s compressed feed.
- Reuse winning templates: If a reel performs well, post a follow-up using the same structure within 48–72 hours while the algorithm is favourable.
Common Mistakes to Avoid
Most reels fail because of small, fixable issues, not because the template is bad. Watch out for these:
- Wrong aspect ratio: Always export 9:16 vertical. A 16:9 export with black bars looks unprofessional and gets less reach.
- Skipping the cover frame: A clean cover image dramatically improves click-through from the Reels grid — do not leave it as the first auto-frame.
- Copyrighted music in the wrong region: Some songs are blocked in specific countries; preview your reel from a friend’s account before declaring it final.
- Over-editing: Too many transitions feel chaotic. Three to five hard cuts plus the trending audio is usually enough.
What You Need to Recreate This
- A smartphone with the latest VN Video Editor installed
- The exact template / VN code shared in the post above
- One reference photo or video clip in good lighting
- The trending audio saved to your VN drafts
- Roughly 5–10 minutes of focused editing time
FAQ
Is this method free to use?
The core workflow uses tools that have a generous free tier. Where a paid plan unlocks faster rendering or higher quality, the post mentions it explicitly. You can complete the basic tutorial without paying anything.
How long does it take to recreate this?
Most readers finish in 10–20 minutes the first time and under 5 minutes once familiar with the tool. The slowest part is usually the rendering or export step.
Will this work on my phone?
Yes — this guide is mobile-first wherever possible. The tutorial uses tools available on both Android and iOS. If a desktop step is required it will be clearly marked.
What if my output looks different from the demo?
Small differences in source media (lighting, framing, resolution) change the final result. Re-check the inputs first, then revisit the settings step by step. Most variations come from a single mismatched parameter.
Can I use this commercially?
It depends on the licence of the underlying tool, music, or assets. Check the original tool’s terms of service before using output for paid client work or branded campaigns.
Found an error in this guide or want to suggest an update? Drop us a note via the contact page — we read every message.